My 10 Step Program for Replacing the Final Drive Pinion Gear Oil SealNote: The following sequences of work were gathered from Clymer Manual M500-3 BMW K-Series 1985-1997, Chapter 11, Rear Suspension and Final Drive ©2002 and from BMW Repair Manual K75 K100 LT All 2V Models, Chapter 33, Rear Wheel Drive, dated: 4.1988 / scann: 12.2011 (BMW p/n: 01 51 9 798 791)
1.Completely remove final drive from your K-bike and clean it thoroughly.
2. Remove plastic button from center of case, on the wheel side (so it doesnt melt during heating operations described below). Remove two screws that secure cover to the case. Mount final drive to case holding plate (see photo in earlier post) - use (2) rear wheel bolts and (2) socket head screws that are normally used to connect swing arm to final drive.
3. Use 36mm x 1/2" drive deep socket, breaker bar and cheater to break loose the hex nut surrounding the shaft splines. Note: this nut was previously set at 130-160 ft-lbs with red Loctite
dont be shy about using a long cheater bar and a friend.
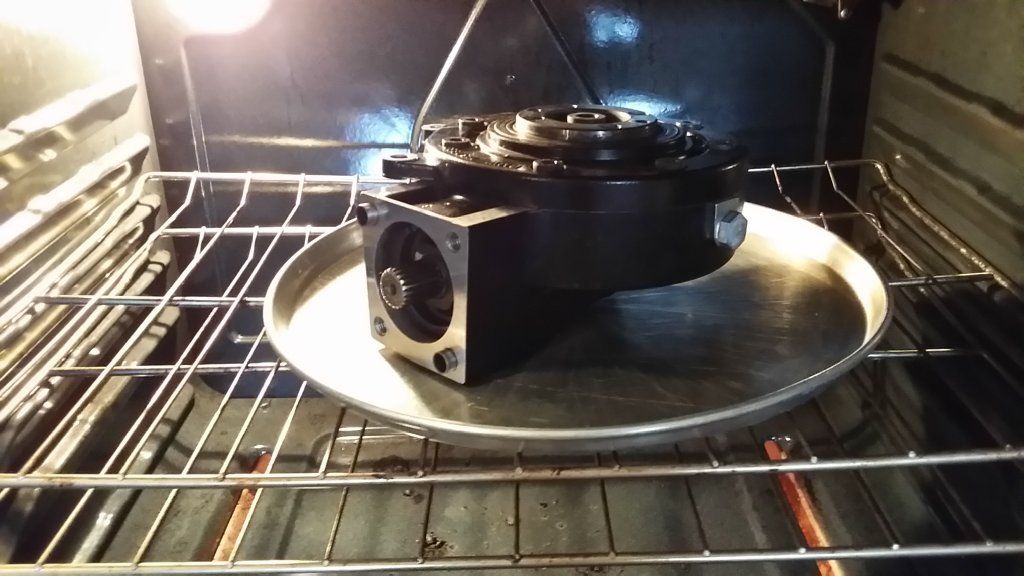
4. Heat final drive neck to 250 deg F with a heat gun. Alternately, I put the entire final drive assembly - affixed to the case holding plate - on an old pan in the oven at 325 deg for 45 minutes. I used an infrared thermometer and removed the drive when exterior temperature reading was 275 deg. Note photo below shows initial "oven bake" without case holding plate. On subsequent runs, I did include holding plate, too.
5.Use custom threaded ring removal tool, breaker bar and cheater to break loose the threaded ring.
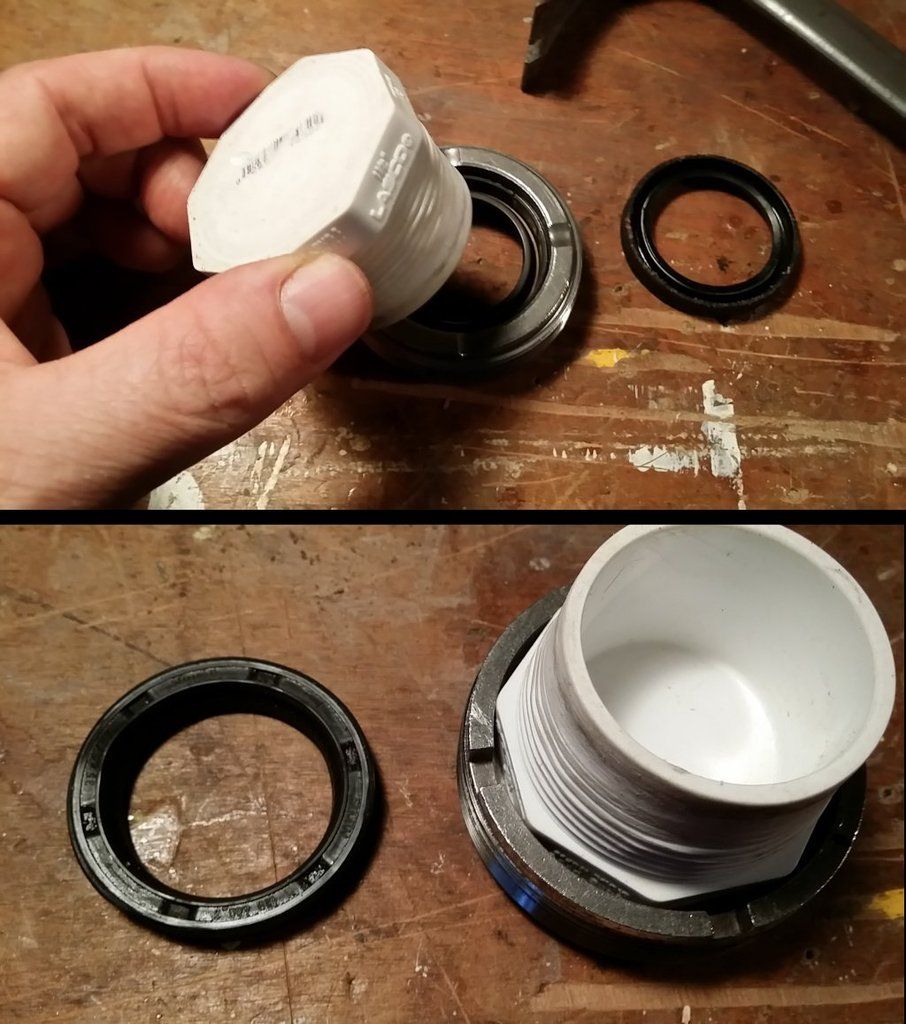
6.Use 1-1/4" threaded PVC cap, 5" piece of wood and hammer to remove pinion gear oil seal from the threaded ring (notches down) (see top picture below). After cleaning threads, wipe a little final drive gear lube onto outside of new oil seal and inside of threaded ring. Next, set the new oil seal (lettering side up) into the threaded ring (notches up) using the 1-1/4" threaded PVC cap, 5" piece of wood and hammer. I used the flat part of the PVC cap facing down (see bottom picture below) so that cap would bottom out on the lip inside of threaded ring (the "lip" is best seen in freezer photo below). BUT
the lettering side of the new oil seal needs to be recessed another 0.11 to 0.13 beyond the lip. To do this you need to flip the PVC cap over and use the threaded end again. The oil seal is very tight at this point and this last step takes patience you dont want to drive it too deeply or set it out of square you might damage the seal trying to correct this depth setting or lack of square-ness from the reverse side.
7.Put the 36mm hex nut back in the oven and heat to over 300 deg f. Use wire brush to remove old, hard red Loctite. After nut cools down, add small amount (how to measure 0.1 gram?) of red Loctite to female threads of 36mm hex nut
8.Coat male threads of threaded ring and female threads inside neck of final drive with Hylomar Universal. I probably got about 75% coverage on both. Put threaded ring in the freezer for at least 15 minutes (save vodka for celebration when complete).

9.Heat final drive (and holding plate), similar to above, to around 200 deg F. Set oven at 275 deg for 45 minutes.
10.By hand (using threaded ring tool) thread the cold threaded ring into hot final drive. Use torque wrench to set ring at 80-90 ft-lbs (see left picture below). By hand (using deep socket) thread the 36 mm hex nut into the final drive. Use torque wrench and 42 cheater (and the help of my 18-year-old son) to set nut at 130-160 ft-lbs (see right picture below).

Success!


