Ok then lets continue the journey...
I think the next step was to design the triple tree clamp, I badly wanted some "pocket" for separate gear indicator and motogadget motoscope pro display so Adam (the owner of DIXER PARTS) took care of me and cut excellent clamp. I sandblasted it and cerakoted with the same finish as engine.
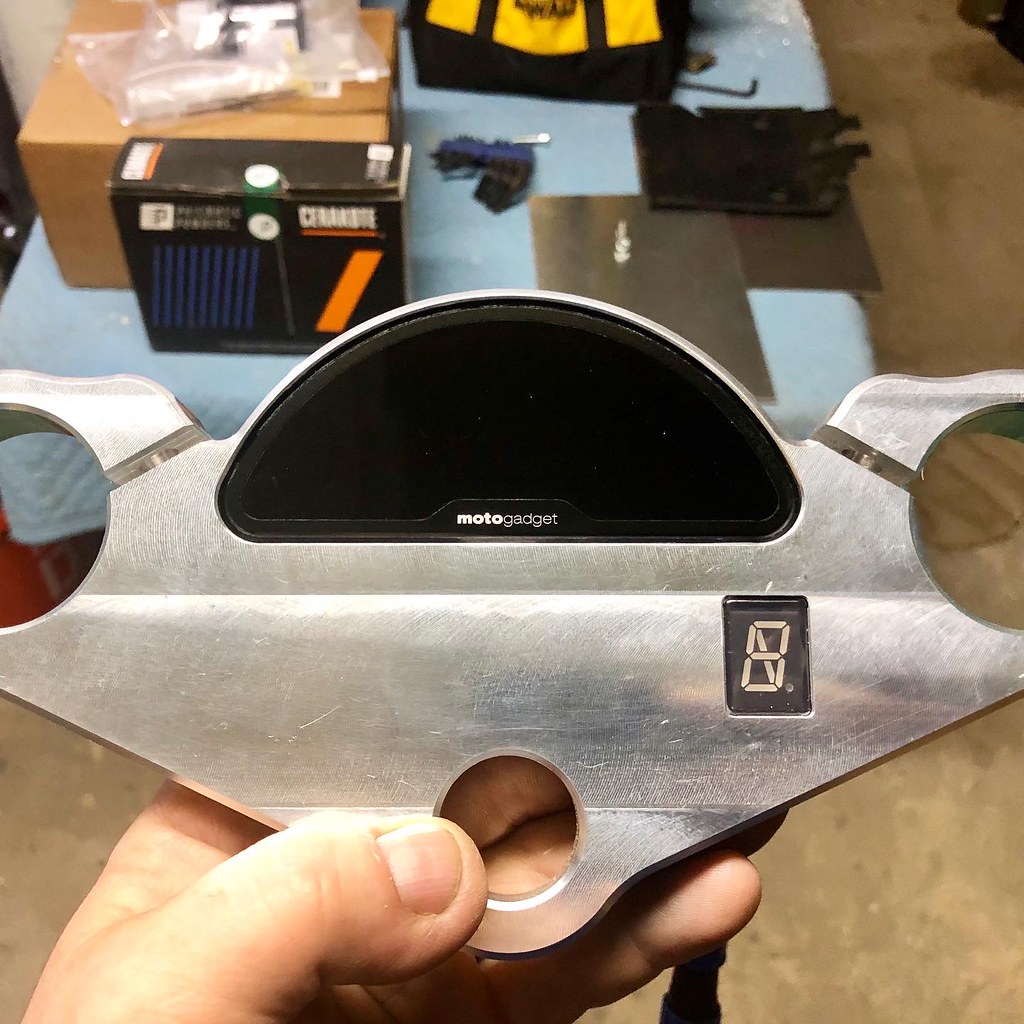 K1100RS triple tree clamp
 by
wooboodoo, on Flickr
 K1100RS triple tree clamp
 by
wooboodoo, on Flickr
 K1100RS triple tree clamp
 by
wooboodoo, on Flickr
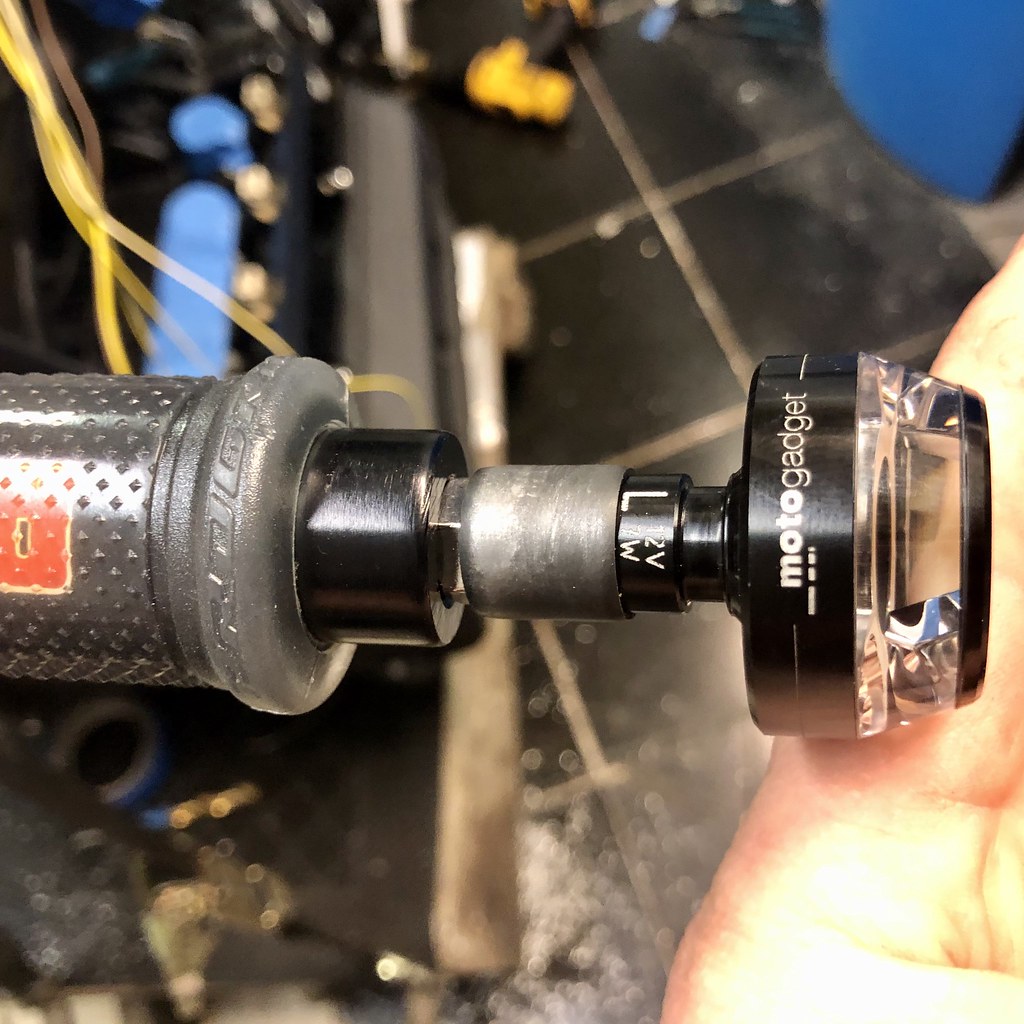
As about controls I decided to go with quick throttle from ACCOSSATO, I'm pretty happy with these silicone grips and quality. Got them from OmniaRacing Italy.
 Accossato quick throttle
 by
wooboodoo, on Flickr
 Accossato quick throttle
 by
wooboodoo, on Flickr
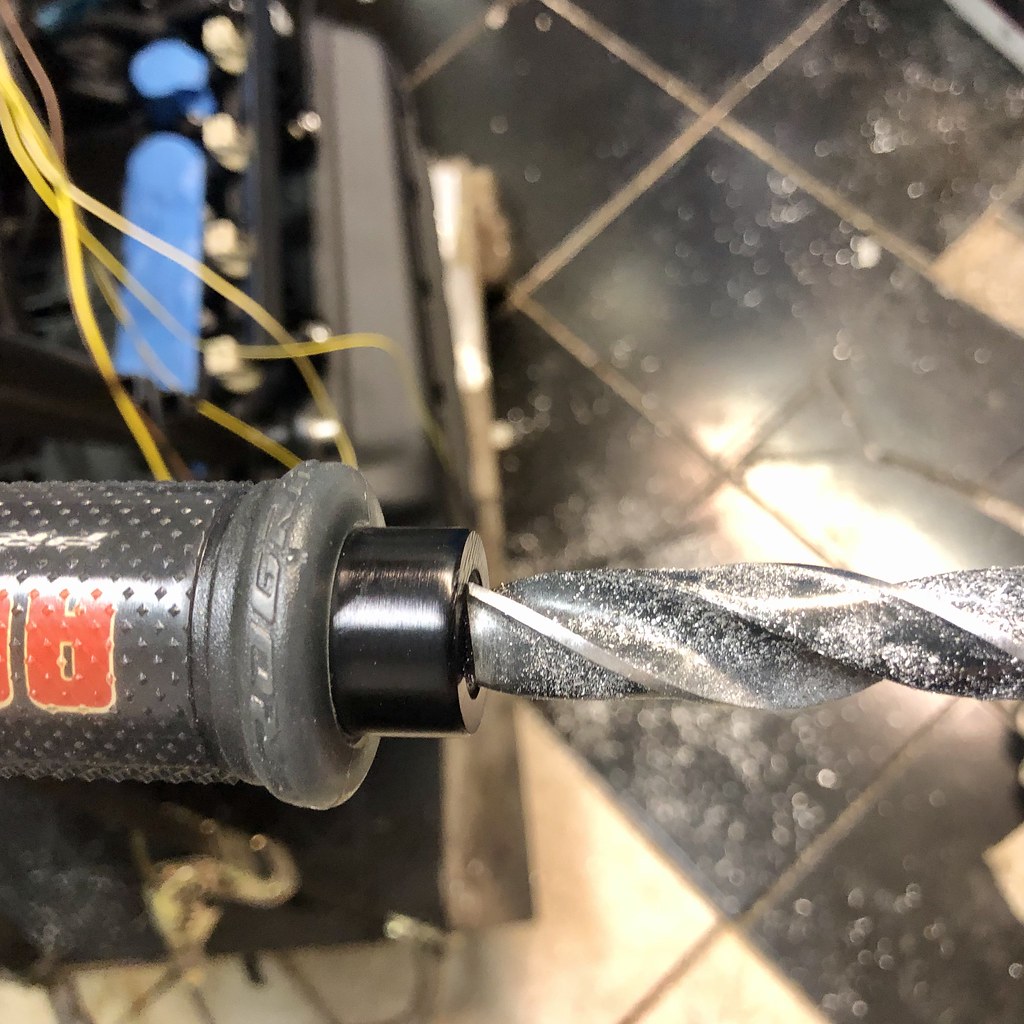
Next step was to install Motogadget m-Blaze Disc Bar End LED Turn Signal into the ABM strap-ons handebar.
As you can see on the pic the hole in the ABM strap-ons handlebar is too small for installation so I had to re-drill the holes. It was a two steps drilling process, first bit I used was 1/2 (12,7mm) then second one 15mm.
At the same time I installed the motogadget m.button on the throttle side, I drilled the hole about 3 deep so I could fit m.button device and easily pass the turn signal wires on the side of it. The clutch side handlebar hole is about 1,5 deep.
 Untitled
 by
wooboodoo, on Flickr
 m.blaze
 by
wooboodoo, on Flickr
 m.blaze
 by
wooboodoo, on Flickr
 m.blaze
 by
wooboodoo, on Flickr
 m.blaze
 by
wooboodoo, on Flickr
 m.blaze
 by
wooboodoo, on Flickr
 m.blaze
 by
wooboodoo, on Flickr
The space left between the grip and turn signal is for motogadget Motogadget m.View Flight Bar End Metalmirrors
 m.view
 by
wooboodoo, on Flickr
Ok, next step was to create some seat
 Seat
Seat by
wooboodoo, on Flickr
 Seat
Seat by
wooboodoo, on Flickr
 Seat
Seat by
wooboodoo, on Flickr
For the first 3 fiberglass layers i used liquid epoxy then for additional layers I got pro grade very durable thick epoxy to make the base about 3/8" thick and very strong. On the top I installed aluminum plates to make holes later and thread them for seat support.
 Seat
Seat by
wooboodoo, on Flickr
 Seat
Seat by
wooboodoo, on Flickr
 Seat
Seat by
wooboodoo, on Flickr
 Seat
Seat by
wooboodoo, on Flickr
To design stitches took me a few days and finally got something like this...
 Seat
Seat by
wooboodoo, on Flickr
Then ride to the McCoys upholstery in Woodside NY to get it done the right way !
 Seat
Seat by
wooboodoo, on Flickr
 Seat
Seat by
wooboodoo, on Flickr
 Seat
Seat by
wooboodoo, on Flickr
Since my bike is a Roach it will have a few Witcher accents here and there. I'm from Poland and love this books since I was kid so why not


